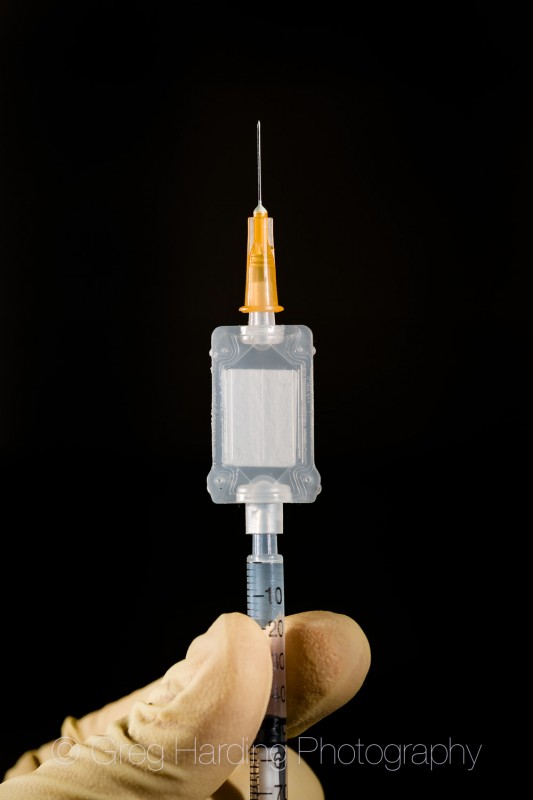
This image was captured at a recent commercial pharmaceutical shoot. Not bad, eh? A pretty syringe, probably shot against black in a studio style setup? Well no, not quite.

The cool thing about this picture (apart from the Hydris technology featured in the syringe), was that it was taken in a bright lab area, with absolutely no black background in sight.
I was with the Pharmaceutical clients while we were shooting and they were pretty bowled over as to how I'd managed this, as the image immediately before was shot as if against a white background. I suggested that the object would look better against a black background and within a few quick camera adjustments, the very next shot produced a black background under the same lighting conditions.
No background change, no lighting changes... they thought it was a great magic trick and I suppose to the outsider it might look that way.
So how's this trick done? Here's where knowing your trade pays dividends; this technique calls for the ability to be able to control the ambient light level independently of the main flash units.
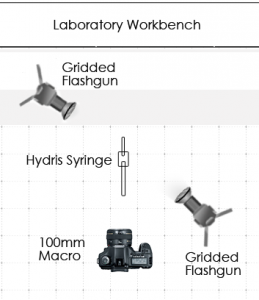
Here's the setup. As you can see this image was exposed using flash – two580 EX Canon flashguns. No big-budget studio heads, just small, portable and adaptable flashguns.

In my experience these are perfect for intricate macro shots. They offer great control, built-in remote triggering and with a good set of Honl modifiers you can shape the light to make it fit the look you're striving for.
In this instance, I wanted some pretty aggressive cross lighting, without any background spill or lens flare. The idea was to illuminate the syringe and gloved hand only. Controlling the light in this case is super-important, as any stray light could raise the background light level, so I chose to use tight grid modifiers.
So how do you change the background from white to black just with a couple of flashes? It's pretty easy when you understand the mechanics of exposure with flash.
Let’s break it down. In this instance, to correctly expose the lab for the ambient would have been ISO 640 at 1/125th @ f5.6. How does that help?
We can break the exposure down further, if we understand that the aperture controls the amount of flash the scene receives and the shutter controls the ambient light fill. The camera’s ISO setting will affect both. For example if you increase the ISO, or slow the shutter, the ambient light level would increase (become brighter). Reduce the ISO or slow the shutter speed* and you start to kill the ambient fill (gets darker). Since the aperture is primarily affecting the flash exposure, the shutter speed and ISO can be varied to suit the mood of the image you want.
Note: Only raise the shutter speed to the maximum sync speed of your camera. Shooting at speeds above your sync speed will result in curtain sync errors with part of the frame cut off.
The choice of aperture was decided so that any background detail would be completely blurred. I set the flash guns and camera at f/5.6 which, for this example, could have been around 1/16th power on the flashguns. I then placed the flashes where I wanted the light to shape from.
Here's the magic bit. If we apply our understanding of how exposure is made up when using flash, all you need to do to get the background darker is to lower the ISO of the camera (so that the flash heads increase the power to compensate) and raise the shutter speed, making sure you don't go above the flash sync of your camera. Drop the ISO low enough and the room will go very dark. I set the camera to 50 ISO, that's an ambient light reduction of over 3 stops and Hey Presto! the background went black.
It's a neat trick, but not really magic. Just a good understanding of how to control light.
I hope you enjoyed this post, if you did feel free to share it with your friends or your social feeds. I always love to hear your comments, so please post them below.
Until next time, keep the magic secret.
p.s A big thanks to Simon from (medicalphotography.co.uk) for providing a professional sounding board and valuable eye for detail in the creation of this post.